Hotel photography – moving beyond your “Auto” setting

Many hotel managers when deciding to do their own hotel photography will go out and buy a superb camera that’s chock-full of fancy features and apparently does everything for you. I met one owner who’d spent over $3000 on a camera and it had hundreds of settings, but sadly he had it set almost always to “Auto”. This was a shame because by changing the setting of your camera you can get some very good effects if you’re willing to experiment a bit and step outside your comfort zone.
We’d like to give you a hand with it, so here are a few ideas to help you get the best out of your camera and make your images “pop” out of the screen and hopefully, attract even more people to your rooms. Remember, good photography can make the difference between a full hotel and an empty one!
Switch to “M”
If you’ve been stuck using “Auto” on the camera dial since you bought it, you’ll want to now switch to “M” which stands for manual. Now, don’t worry, remember you have a digital camera and this means you can take as many pictures as you want – you’re not wasting precious film.
In this mode you can change a number of things about how your camera works and in this article we’ll talk about “aperture”. This is simply the size of a diaphragm inside the lens and you can change this to affect how much light is allowed in. On your SLR camera this will be dynamic, i.e. you can change it in the camera settings and the size is usually measured in “f-stops”. It’s a bit counter-intuitive, but the lower the number, the more light is let through. An easy way of thinking about this is to imagine that the higher the number, the more of the diaphragm is in the way of the light. A low number means less of the diaphragm is in the way so more light gets through – easy, huh?
It’s not just about light and dark though!
You can get some nice effects by changing the aperture of your lens though because by doing so you are not only changing the amount of light hitting the sensor, y0u’re also changing the angle at which it hits so you can get some nice focus effects. By aiming your camera at a particular feature of your room, you can focus on that and blur out the rest of the room. Experiment with this by changing to a shallow depth of field (using a large aperture), pointing the camera at something in the room and then taking the photo.
Here’s an example of that technique, before and after:

Large depth of field
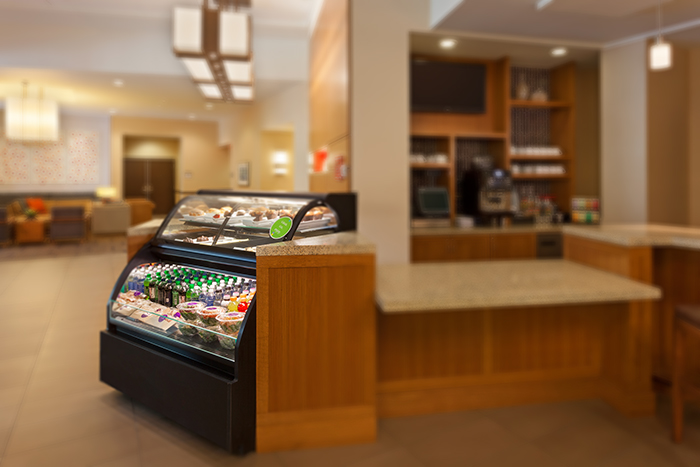
Shallow depth of field, focusing on the fridge
Your hotel probably has lots of interesting objects that can be highlighted in this way and the effect can draw people’s eyes to something important to both them and you, however as with all things, use sparingly!